


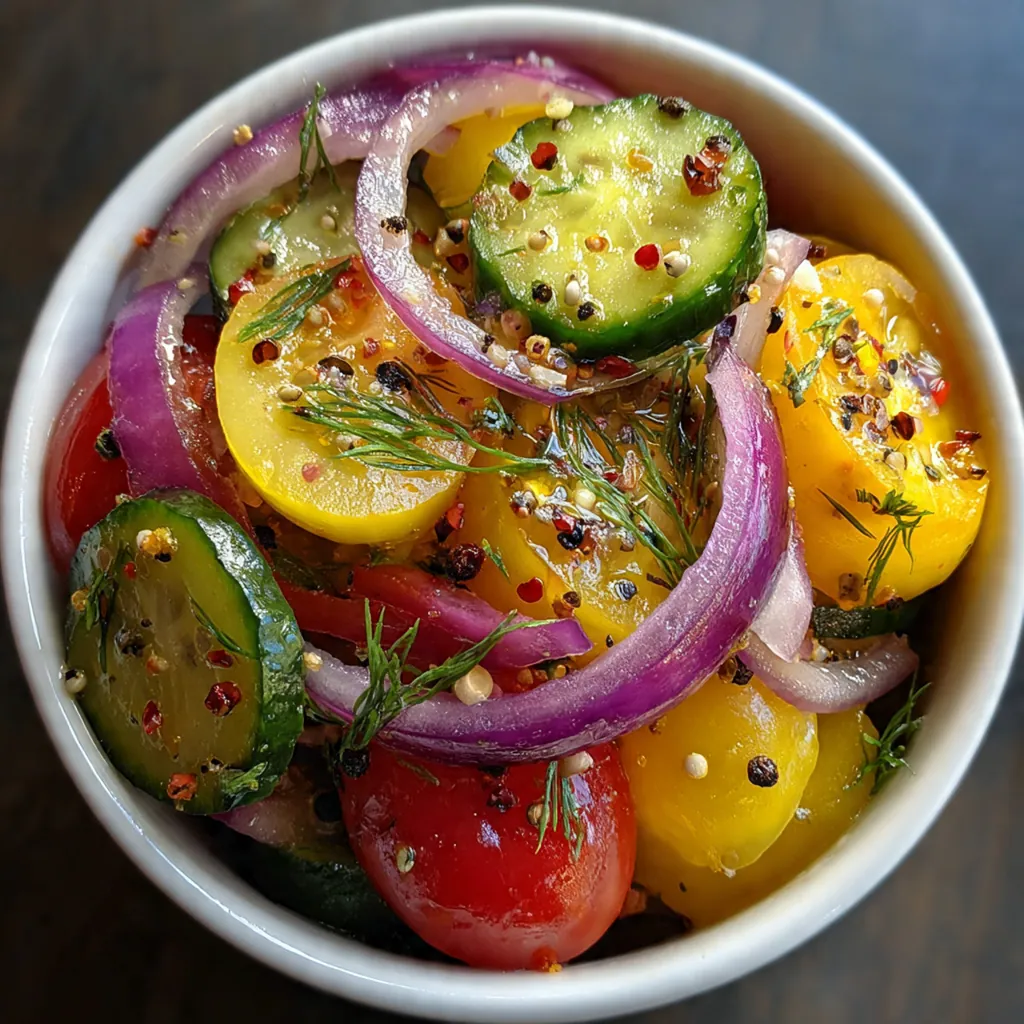
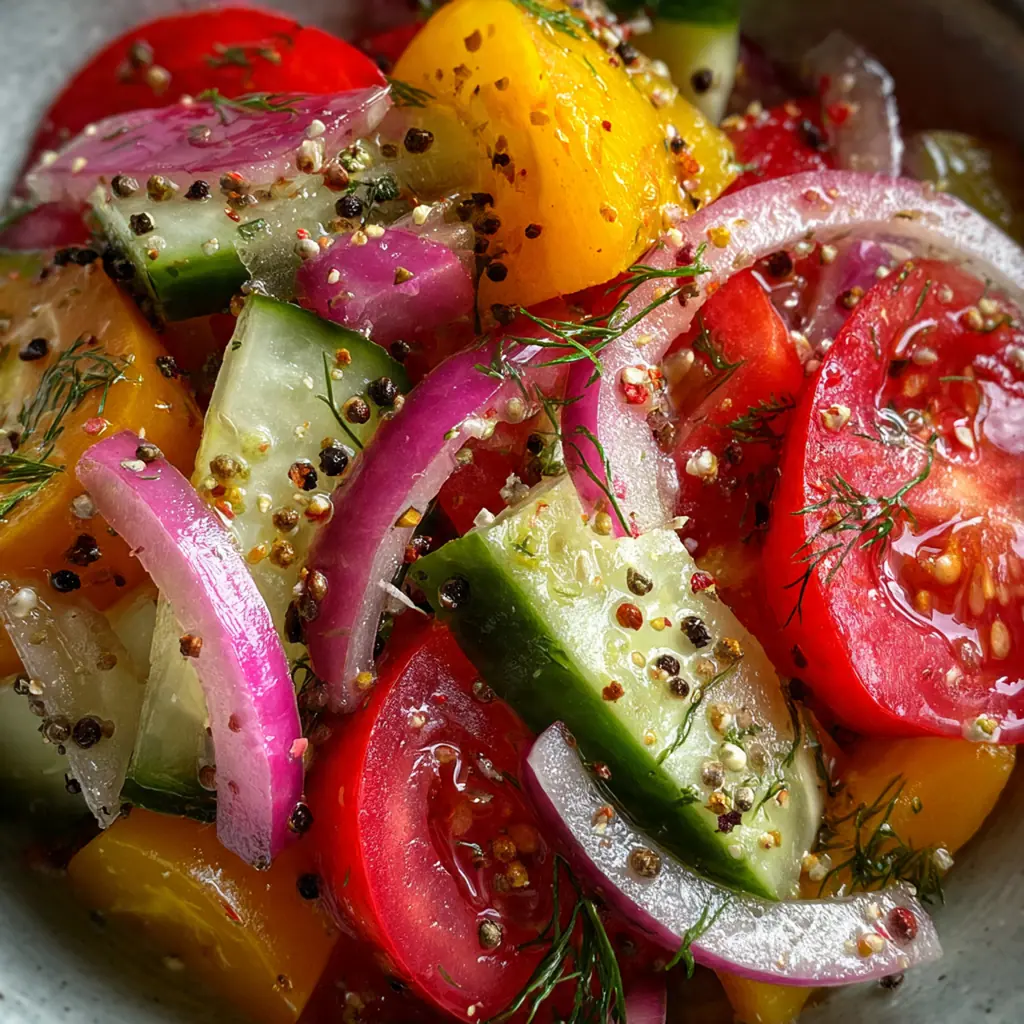
My quick pickled tomato cucumber onion salad is the ultimate summer side dish that saves dinner when you’re staring down a glut of garden veggies. This crisp, tangy salad brings together bright tomatoes, cool cucumbers, and sharp red onions in a simple vinegar brine that you can whip up in minutes. The beauty lies in how the flavors meld as it sits, letting every chunk soak up that delicious pickling liquid. It’s been my go-to for backyard BBQs and weeknight meal prep because it actually gets better overnight.
Why You'll Love This Recipe
- Ready to eat in just 30 minutes but the flavors deepen beautifully overnight
- It’s a zero-cook recipe perfect for scorching hot days when you can’t face the stove
- Crisp texture holds up for days, making it the ultimate meal prep hero
- Use it as a side, a topping, or a snack straight from the jar
- I keep a jar in my fridge at all times during tomato season
Ingredients You’ll Need
- Cherry tomatoes: They deliver a burst of sweet acidity that balances the vinegar perfectly. Look for firm, deeply colored tomatoes without any soft spots for the best crunch.
- Cucumbers: Provide the refreshing cool crunch that makes this salad addictive. Choose firm Kirby or Persian cucumbers with thin skins so you don’t have to peel them.
- Red onion: Adds that signature sharp bite and beautiful color contrast. Slice it paper-thin so it pickles quickly and mellows out instead of overpowering everything.
- Apple cider vinegar: Forms the tangy base of your brine with a subtle fruity note. Always use raw, unfiltered vinegar with the mother for the most complex flavor.
- Sugar: Balances the harsh acidity of the vinegar creating that crave-worthy sweet-tart profile. Granulated white sugar dissolves easily and won’t cloud the brine.
- Kosher salt: Draws moisture from the vegetables creating that perfect pickle crunch. Diamond Crystal is my favorite because it’s less salty by volume than table salt.
- Black peppercorns: Infuse the brine with warm, spicy aromatics. Always use whole peppercorns instead of pre-ground for maximum flavor that doesn’t turn bitter.
- Garlic cloves: Smash them to release their essential oils into the brine. Use fresh, firm cloves without green sprouts for the cleanest, most potent garlic flavor.
- Fresh dill: Brings that classic pickle flavor that makes everything taste like summer. Use the fresh fronds, not dried, because the delicate flavor disappears when dried.
- Red pepper flakes: An optional kick that turns up the heat just enough to keep things interesting. A little goes a long way, so start with just a pinch.
- Celery seed: An optional secret weapon that adds savory depth and that distinctive deli-pickle note. It’s potent, so use sparingly to enhance, not overwhelm.
- Fresh parsley: A bright, grassy garnish that adds color and freshness right before serving. Flat-leaf Italian parsley has more flavor than the curly variety.
How to Make It
Prepare Your Vegetables:
Start by washing everything thoroughly under cool running water. Halve your cherry tomatoes with a sharp knife, slice the cucumbers into uniform 1/4-inch thick half-moons, and slice that red onion as thinly as humanly possible. I like to use a mandoline for the onions to get them tissue-paper thin, which helps them pickle fast and lose that raw bite.
Make The Brine:
Combine the apple cider vinegar, water, sugar, salt, and whole black peppercorns in a medium saucepan. Bring it to a gentle simmer over medium heat, stirring occasionally until every grain of sugar and salt dissolves completely, about 3-4 minutes. You’ll know it’s ready when the liquid looks clear and smells like a proper pickle.
Pack The Jar:
Layer your sliced tomatoes, cucumbers, onion, and smashed garlic cloves into a large 32-ounce glass jar. I like to pack them in tight, alternating layers and sprinkling the fresh dill and optional red pepper flakes throughout. Don’t worry about perfect arrangement, but do leave about an inch of space at the top for the brine.
Pour And Submerge:
Carefully pour the hot brine over your vegetables, making sure everything gets submerged under that tangy liquid. Tap the jar firmly on the counter a few times to release any trapped air bubbles that might float your veggies to the surface. If things aren’t fully covered, give it a gentle poke with a clean spoon to redistribute.
Cool And Marinate:
Let the jar sit on your counter until it reaches room temperature, about 15 minutes. Then screw on the lid tight and slide it into your refrigerator for at least 30 minutes before diving in. The magic happens here as the flavors meld and the vegetables absorb all that tangy, garlicky goodness.
Serve And Enjoy:
When you’re ready to eat, give everything a gentle stir to redistribute the flavors and spices. Use a slotted spoon to scoop out the vegetables, leaving most of the brine behind unless you want to drizzle it over your dish. The pickles will keep getting more complex and delicious over time.
Storage And Longevity:
Keep your pickles in an airtight glass jar in the fridge where they’ll stay crisp and delicious for up to a week. The vegetables gradually soften over time but the flavor only improves. Always use clean utensils to avoid introducing any bacteria that could spoil your hard work.
Pro Storage Tip:
The brine doesn’t have to be a one-trick pony. Once you finish the vegetables, save that flavorful liquid for making quick pickled peppers, carrots, or even radishes. Just drop fresh veggies into the leftover brine and you’ve got another batch ready to go.
You Must Know
- Kirby cucumbers stay crunchiest for the longest time
- Pack vegetables tightly to maximize your jar space
- The onions will lose their harsh bite after just one day
- I always taste the brine before pouring to adjust seasoning
- Letting it sit overnight transforms the flavor completely
Storage Tips
Store your pickled vegetables in a clean, airtight glass jar in the refrigerator and they’ll stay crisp and flavorful for up to one week. The first three days are peak crunch, after which the vegetables gradually soften but the flavor actually improves and gets more melded. Always use clean forks or spoons to scoop out what you need since introducing bacteria from other foods can spoil the whole batch. If you notice any off smells, sliminess, or cloudiness beyond what’s normal, it’s time to toss it and make a fresh batch.
Ingredient Substitutions
If apple cider vinegar isn’t your thing, you can absolutely swap in white wine vinegar or rice vinegar for a lighter, more delicate flavor profile. Just avoid distilled white vinegar as it can taste too harsh and chemical. Don’t have fresh dill? Try fresh parsley, cilantro, or even a sprig of fresh thyme for a completely different but delicious vibe. For the sugar, you can use honey or maple syrup if you prefer natural sweeteners, though they’ll darken the brine slightly. If you’re watching sodium, cut the salt in half and add more to taste after pickling.
Serving Suggestions
I love piling these tangy crunch bombs onto grilled burgers and sandwiches for an instant upgrade that cuts through rich meat flavors. They’re incredible alongside grilled chicken or fish, adding a bright, acidic counterpoint to smoky char. For a vegetarian feast, serve them over creamy hummus with warm pita bread for a fresh appetizer that disappears in minutes. My favorite lazy lunch is a scoop of these pickles on top of a simple green salad with a drizzle of olive oil. They also make an amazing garnish for grain bowls, tacos, or even avocado toast.
Cultural Context
Quick pickling is a universal technique found in kitchens worldwide, from Korean kimchi to Mexican escabeche to Indian achar, though this version leans into classic American deli traditions. The method is essentially a shortcut version of traditional fermentation that uses vinegar’s acidity to create that tangy, preserved quality without weeks of waiting. In my family, we always had jars of something pickling in the fridge, a practice that traces back to the need for preserving summer’s bounty before refrigeration was common. This recipe honors that thrifty, waste-reducing spirit while being fast enough for modern weeknight cooking. It connects me to generations of home cooks who understood that a little vinegar, salt, and patience could transform simple vegetables into something extraordinary.
Pro Tips
- Heat only half the brine if you’re in a rush and mix with cold water
- Save that leftover brine for making quick pickled peppers or carrots
- For extra crunch, add a grape leaf to the jar – the tannins work wonders
- Use a mandoline for perfectly uniform slices that pickle evenly
- I sometimes add a splash of soy sauce for an umami twist
- Over the years, I’ve found that starting with the hottest brine possible gives the best pene…
Frequently Asked Questions
Your Pickled Tomato Cucumber Onion will stay crisp and flavorful for up to 5 days when stored in an airtight container in the refrigerator. The vegetables continue to absorb the brine, often tasting even better on day two.
Yes! While cherry tomatoes work great for Pickled Tomato Cucumber Onion because they hold their shape, you can use any ripe tomato. Just cut larger tomatoes into bite-sized chunks about the same size as your cucumber pieces.
Absolutely! This Pickled Tomato Cucumber Onion recipe is naturally gluten-free. The brine uses apple cider vinegar, water, sugar, and salt—all gluten-free ingredients. It’s a perfect side for anyone avoiding gluten.
Definitely! This Pickled Tomato Cucumber Onion recipe uses 2 tablespoons of sugar, but you can adjust to taste. Add more for a sweeter brine or reduce to 1 tablespoon for a tangier flavor. You can even try honey or maple syrup as alternatives.
This Pickled Tomato Cucumber Onion salad complements grilled meats, sandwiches, and burgers perfectly. Its bright acidity cuts through rich dishes. It’s also great alongside fried chicken or as a refreshing component to American barbecue spreads.