


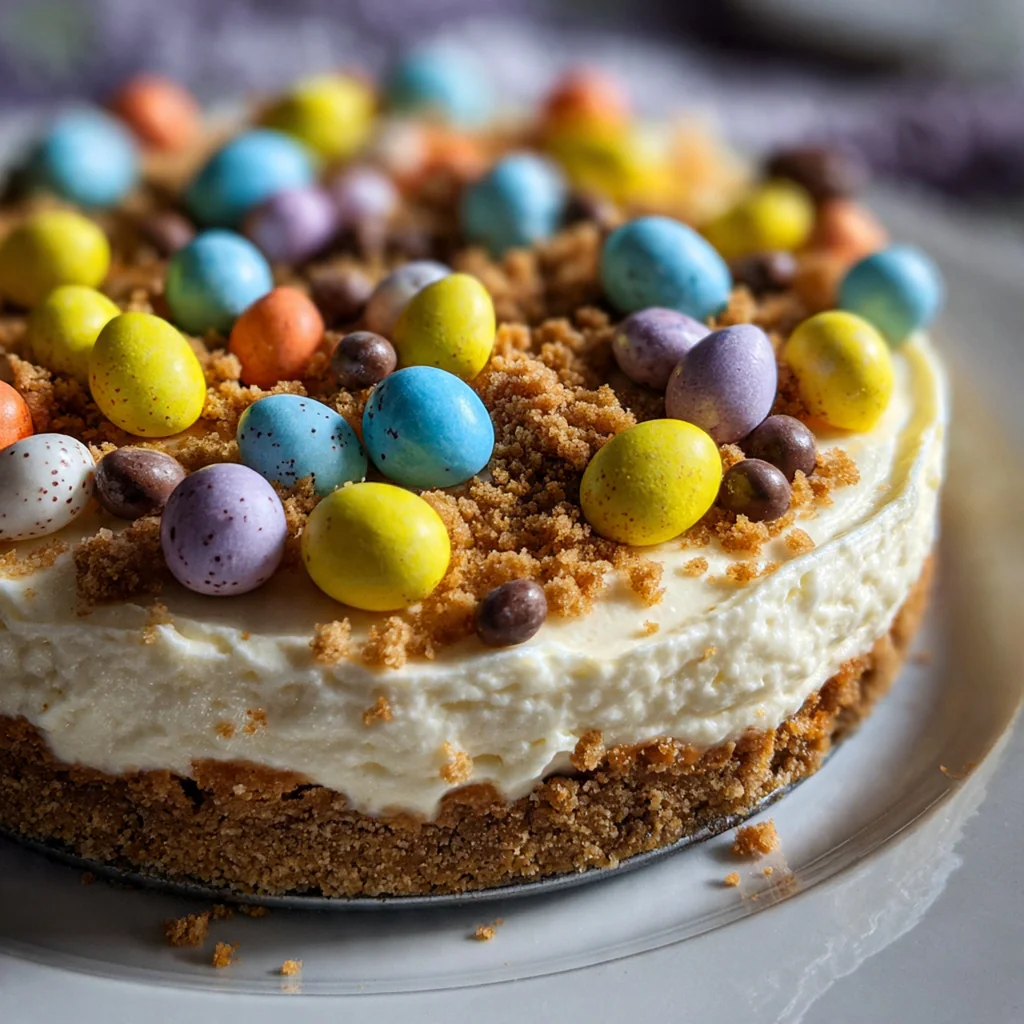
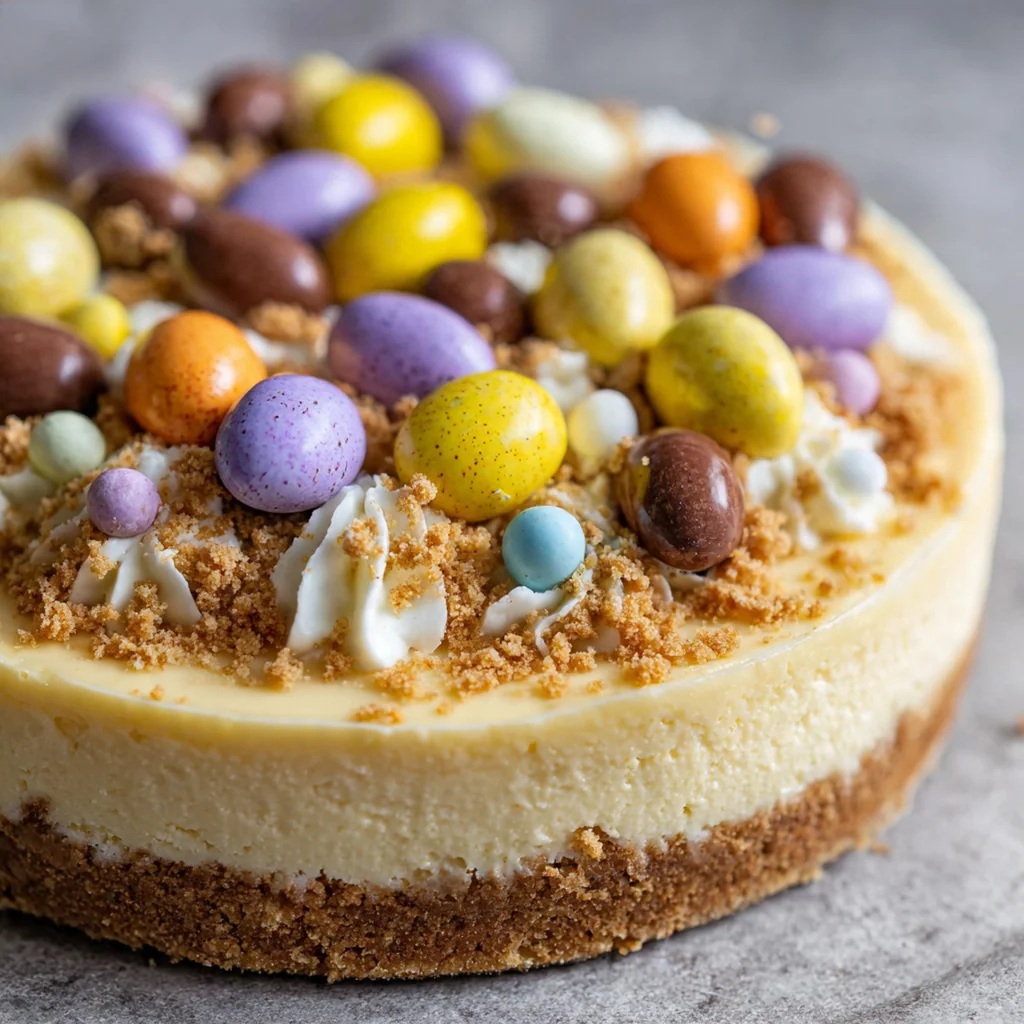
This No Bake Mini Egg Cheesecake is the ultimate spring treat that brings joy without ever turning on your oven. I first created this recipe when I needed a show-stopping Easter dessert that wouldn’t melt in the spring sunshine, and it’s been a family favorite ever since. The British-inspired creamy vanilla filling pairs perfectly with the crunchy biscuit base and colorful Cadbury Mini Eggs for a dessert that looks as good as it tastes. You’ll love how the fridge does all the hard work while you go about your day. It’s the kind of dessert that makes you feel like a baking wizard with minimal effort.
Why You'll Love This Recipe
- No oven required – perfect for warm days or when you don’t want to bake
- Kid-friendly dessert that’s great for Easter parties and celebrations
- Individual portions make serving easy and look impressive
- Creamy, crunchy, and chocolatey all in one bite
- Can be made up to 2 days ahead, saving you time on the day
Ingredients You’ll Need
- Digestive biscuits or graham crackers: These create the sturdy foundation for your cheesecake base. Digestive biscuits offer a slightly sweeter, nuttier flavor typical of British baking, while graham crackers give a familiar honey-spice note. Choose whichever is freshest at your store.
- Unsalted butter: This binds the biscuit crumbs together and adds rich flavor. Using unsalted lets you control the salt level perfectly. Make sure it’s fully melted but not hot when you mix it with the crumbs.
- Full-fat cream cheese: The star of the filling that provides stability and tang. Room temperature is absolutely crucial here – cold cream cheese will leave you with lumps that won’t smooth out. Full-fat versions hold their shape much better than low-fat.
- Powdered sugar: Also called confectioners’ sugar, this dissolves smoothly into the cream cheese without any grittiness. Sifting it first prevents any lumps from forming in your final filling. It sweetens without adding heaviness.
- Vanilla extract: Pure vanilla extract gives depth and warmth to balance the tangy cream cheese. Imitation vanilla works in a pinch, but the real stuff makes a noticeable difference in a dessert where vanilla is a primary flavor.
- Heavy whipping cream: Cold cream whips up to create that light, airy texture in the filling. Heavy cream has the fat content needed to hold stiff peaks. Your bowl and beaters being cold helps it whip faster.
- Cadbury Mini Eggs: These colorful candy-coated chocolate eggs are the signature element. Roughly chopping half distributes chocolate throughout the filling while whole ones make a beautiful topping. They add crunch and that distinctive British chocolate flavor.
- Extra Mini Eggs for decoration: Having extra whole eggs for the top makes each mini cheesecake look festive and immediately recognizable as a seasonal treat.
- Fresh mint leaves for garnish: Optional but recommended for a pop of color and fresh aroma. They cut through the richness beautifully and make the presentation look professional.
- White chocolate shavings: Another optional garnish that adds elegance and extra chocolate flavor. Use a vegetable peeler on a chocolate bar for perfect shavings.
How to Make It
Prepare the Biscuit Base:
Crush the digestive biscuits into fine crumbs using a food processor, or place them in a sealed plastic bag and bash with a rolling pin until you have uniform fine crumbs. Transfer the crumbs to a medium mixing bowl. The finer the crumbs, the more cohesive your base will be.
Mix the Base Together:
Pour the melted butter over the biscuit crumbs and mix thoroughly with a fork until every crumb is evenly coated and the mixture resembles wet sand. This even coating prevents a crumbly base that falls apart when you bite into it.
Create Individual Portions:
Divide the biscuit mixture evenly between 12 individual serving glasses or a muffin tin lined with paper cases. Press down firmly using the back of a spoon to create a compact, level base. Pressing firmly is key to a stable foundation.
Chill the Bases:
Place your prepared bases in the refrigerator to chill for 15 minutes. This quick chill sets the butter and prevents the cheesecake filling from mixing with the base when you add it. Don’t skip this step.
Mix the Cream Cheese Filling:
In a large bowl, beat the room temperature cream cheese with an electric mixer on medium speed for 2-3 minutes until completely smooth and creamy with absolutely no lumps. Scrape down the sides of the bowl frequently during this process.
Sweeten and Flavor:
Add the sifted powdered sugar and vanilla extract to the cream cheese. Continue beating on low speed until fully combined and smooth. Scrape down the sides of the bowl as needed. Sifting the sugar is non-negotiable for a silky texture.
Whip the Cream:
In a separate clean bowl, whip the cold heavy cream using an electric mixer until stiff peaks form, about 3-4 minutes. You’ll know it’s ready when you can lift the beaters and the cream holds its shape. Be careful not to over-whip or it turns grainy.
Fold Together:
Gently fold the whipped cream into the cream cheese mixture using a large metal spoon or spatula. Fold carefully in a figure-eight motion to maintain the air in the mixture until just combined. Over-mixing will deflate your cream and make the filling runny.
Add the Mini Eggs:
Roughly chop half of the Mini Eggs and fold them into the cheesecake filling, reserving the remaining whole eggs for decoration. The chopped pieces provide chocolatey bursts throughout every bite.
Fill the Glasses:
Spoon or pipe the cheesecake filling evenly over the chilled biscuit bases in each glass, filling to about 1/2 inch from the top. Using a piping bag gives cleaner layers, but a spoon works just fine too.
Set the Cheesecakes:
Refrigerate the mini cheesecakes for at least 4 hours, or ideally overnight, to set completely. The filling should feel firm to the touch when gently pressed. This waiting period is when the magic happens.
Decorate and Serve:
Just before serving, crush the reserved Mini Eggs lightly and sprinkle over the top of each cheesecake. Add a whole Mini Egg or fresh mint leaf for extra decoration if desired. Serve chilled directly from the fridge.
Store Properly:
These cheesecakes are best enjoyed within 3 days of making. Keep them covered in the refrigerator to prevent them from absorbing other food odors. The texture actually improves after the first day as everything melds together.
You Must Know
- Room temperature cream cheese prevents lumps – plan ahead and take it out an hour before
- Full-fat cream cheese is essential for proper structure and stability
- Don’t over-mix once you add the whipped cream or it’ll become runny
- Chill your mixing bowl and beaters before whipping cream for faster results
- Add biscuit base first and use a piping bag for cleaner layers
- The most important tip I can share is patience during the chilling time. I know it’s temptin…
Storage Tips
Store your mini cheesecakes in an airtight container in the refrigerator for up to 3 days, keeping the Mini Egg topping on just before serving to maintain that crunch. If you need to make them further ahead, freeze the plain cheesecakes (without any topping) for up to 1 month by wrapping each one individually in plastic wrap and placing them in a freezer bag. Thaw overnight in the refrigerator and add fresh Mini Eggs right before your guests arrive. I actually think the texture improves after a day in the fridge as everything settles together beautifully. The biscuit base might soften slightly over time, but it stays deliciously chewy.
Ingredient Substitutions
If you can’t find digestive biscuits, any plain sweet biscuit or graham crackers work perfectly – vanilla wafers are another great option for a slightly sweeter base. For the cream cheese, Philadelphia brand is my go-to for consistency, but any full-fat block cream cheese will work – just avoid the spreadable tub varieties which contain too much water. If you need a dairy-free version, plant-based cream cheese and coconut cream (the solid part from a chilled can) can substitute, though the flavor will be different. Mini Eggs are the star, but you can swap in any candy-coated chocolate eggs or even chopped Creme Eggs for a different seasonal twist. For the butter, I’ve successfully used both salted and unsalted, just adjust any added salt accordingly.
Serving Suggestions
Serve these mini cheesecakes chilled straight from the fridge for the best texture. They’re perfect on a spring dessert platter alongside lemon bars and fruit tarts for an Easter brunch spread. I love presenting them on a tiered cake stand with fresh flowers tucked around the base for a gorgeous centerpiece. Pair them with hot tea or coffee for an afternoon treat, or serve with a glass of dessert wine for a more elegant affair. For kids’ parties, arrange them on a colorful platter with extra Mini Eggs scattered around the base. They’re also fantastic as a make-ahead dessert for potlucks since they’re individually portioned and travel well in a covered container.
Cultural Context
This cheesecake represents the joyful British tradition of using Cadbury Mini Eggs as the star ingredient in spring desserts, a practice that’s become iconic across the UK and Commonwealth countries around Easter time. Unlike traditional baked cheesecakes that rely on eggs for structure, this no-bake style celebrates the British love for simple, reliable recipes that don’t require fussy oven work. The use of digestive biscuits as a base is quintessentially British – they’re found in virtually every UK biscuit tin and provide the perfect neutral, slightly sweet canvas for creamy fillings. What I love about this recipe is how it adapts classic British baking sensibilities (simple ingredients, reliable results) with the fun, festive nature of modern celebrations. It’s the kind of dessert you’d find at a village fete or family gathering where the focus is on sharing something sweet and homemade.
Pro Tips
- Make sure your cream cheese is truly at room temperature to avoid lumps in the filling
- Use full-fat cream cheese for the best texture and stability
- Don’t over-mix the filling once you add the whipped cream or it may become runny
- Chill your mixing bowl and beaters before whipping the cream for faster results
- For cleaner layers, add the biscuit base to the glasses first and use a piping bag for the f…
- I always make these the night before I need them – the flavors meld beautifully and you won’…
Frequently Asked Questions
Digestive biscuits are traditional for British cheesecakes, providing a perfect sturdy and slightly savory base. However, you can easily substitute them with graham crackers, which are a fantastic alternative. Just ensure you crush them finely and mix thoroughly with the melted unsalted butter to get that signature crumbly texture.
For the perfect sliceable texture, this cheesecake needs at least 4 hours in the fridge, but overnight is best. The 240-minute (4-hour) chill time mentioned in the details is the minimum to ensure the heavy whipping cream and cream cheese have fully firmed up.
Absolutely! While Cadbury Mini Eggs give it that signature spring look and crunchy shell, you can substitute them with chopped Easter eggs, chocolate chips, or even crushed Oreos. If you want to keep the mini egg aesthetic, look for other brands of candy-coated chocolate mini eggs found in most supermarkets during spring.
The key is using room temperature full-fat cream cheese. Take it out of the fridge at least an hour before you start. Beat the cream cheese with the powdered sugar and vanilla extract until it’s completely smooth before adding the cold heavy cream. This ensures a silky, lump-free filling every time.
Yes, this dessert is perfect for British celebrations like Easter, Mother’s Day, or a Sunday roast. Its classic British ingredients—digestive biscuits and heavy cream—make it a familiar favorite, while the colorful Mini Eggs add a festive, modern twist that appeals to both kids and adults.