

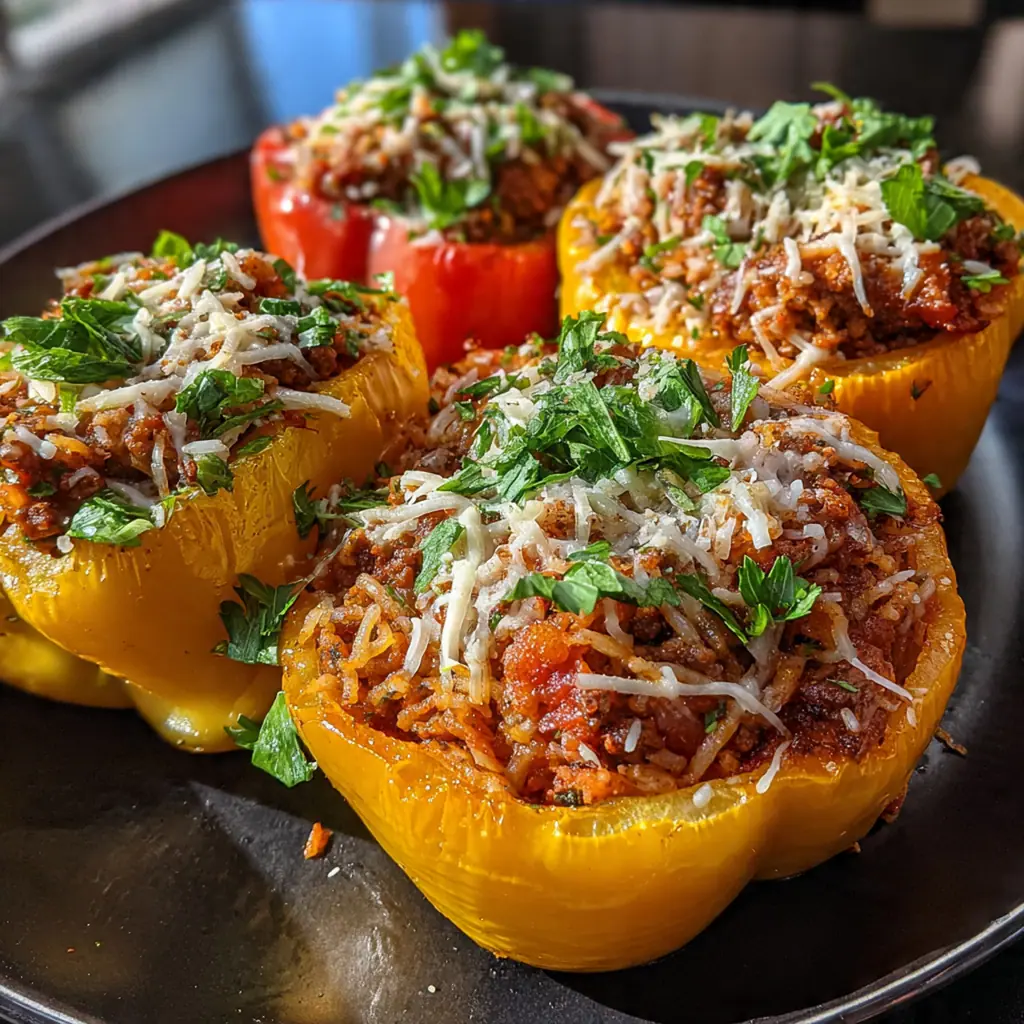
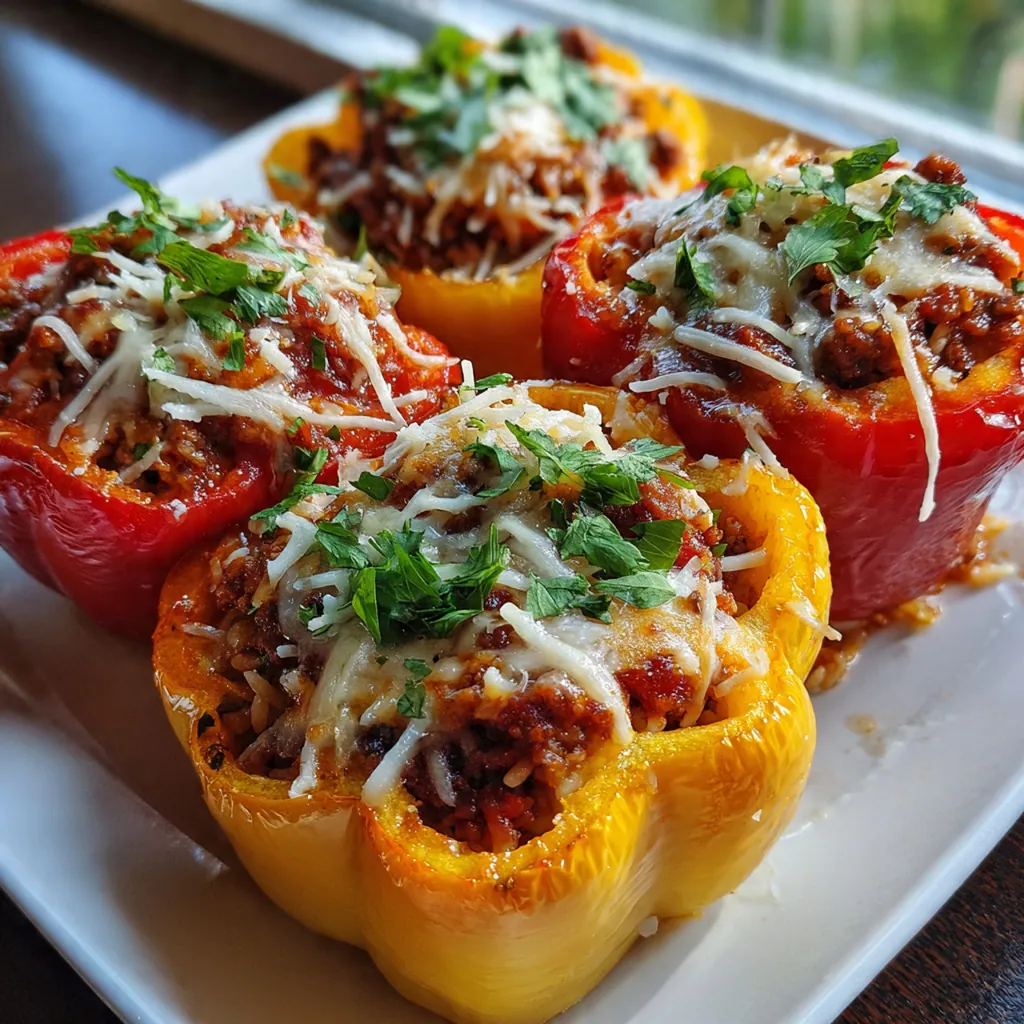
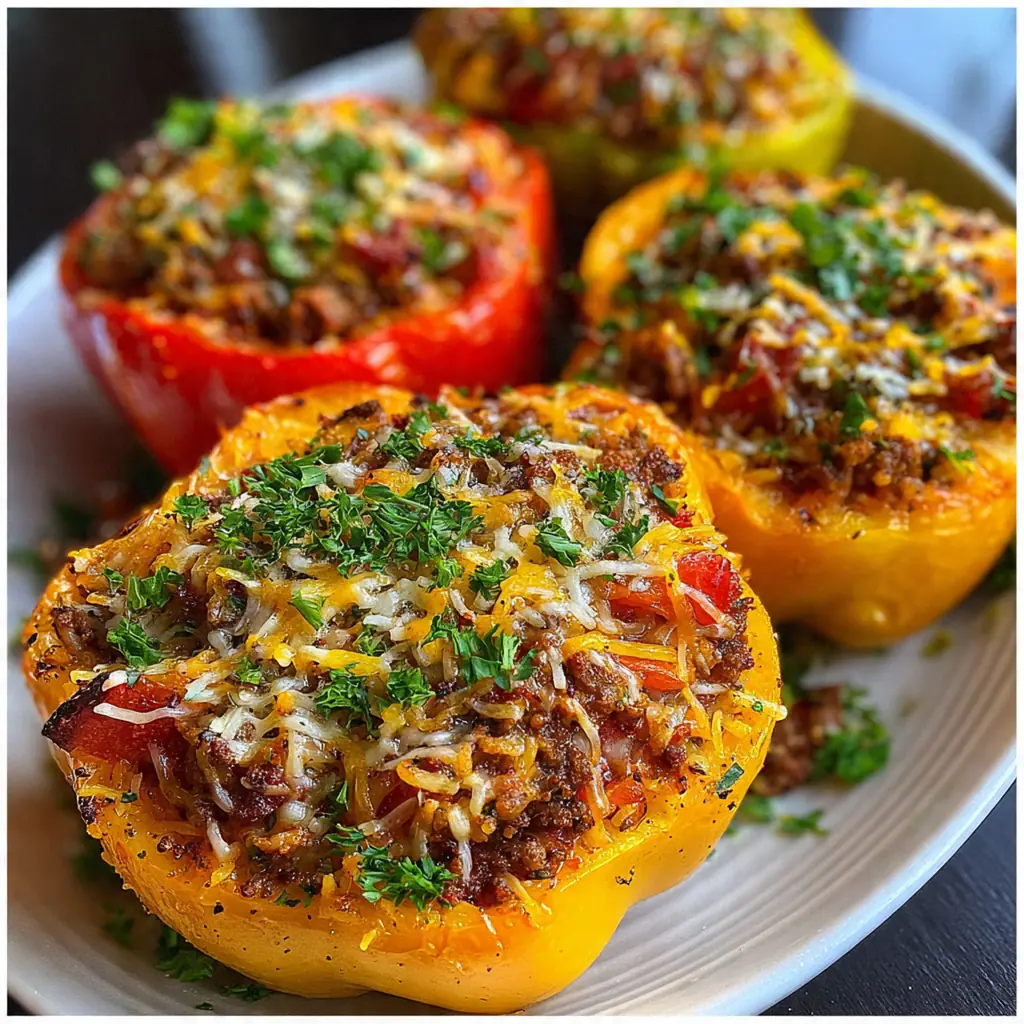
My Classic Stuffed Bell Peppers Recipe brings back memories of family dinners where the table was filled with laughter and the aroma of savory beef and rice. This traditional American dish transforms simple bell peppers into edible bowls packed with seasoned ground beef, fluffy rice, melty cheese, and sweet tomatoes. The peppers become tender while baking, creating a perfect harmony of textures and flavors that feels like a warm hug on a plate. It’s a comforting, all-in-one meal that proves simple ingredients can create something truly special for your loved ones.
Why You'll Love This Recipe
- Everything cooks in one dish, leaving you with minimal cleanup
- A complete meal with protein, grains, and vegetables all together
- Kids love the fun individual serving size they can call their own
- The flavors get even better as leftovers for tomorrow’s lunch
- I make this weekly because my family devours it every single time
Ingredients You’ll Need
- Large bell peppers: These become your edible serving vessels, choose firm ones with smooth skin that stand upright easily. Any color works beautifully, though I love mixing red, yellow, and orange for a vibrant presentation.
- Olive oil: Adds richness and helps soften the onions without burning. A good quality extra virgin olive oil provides the best base flavor for sautéing.
- Yellow onion: Provides essential sweetness and depth when cooked down. Look for firm onions with dry, papery skins for the freshest taste.
- Garlic: Brings aromatic punch that infuses the entire filling. Fresh cloves minced right before cooking give you the most vibrant flavor.
- Ground beef: The heart of the filling, providing satisfying protein and savory richness. An 85/15 blend offers the perfect balance of flavor and moisture.
- Salt: Essential for bringing all the other flavors to life and seasoning the beef properly. It enhances every component in the filling.
- Black pepper: Adds gentle heat and complexity to balance the savory meat. Freshly ground provides the best aromatic quality.
- Dried oregano: Lends that classic Mediterranean herb flavor that makes these peppers taste authentic. It pairs perfectly with tomatoes and beef.
- Diced tomatoes: The juicy foundation that binds the filling together and adds moisture. The undrained liquid keeps everything moist during baking.
- Cooked long-grain white rice: Provides fluffy texture and stretches the filling to feed your family. It soaks up all the delicious juices and spices.
- Cheddar or Monterey Jack cheese: Melts into creamy perfection, creating that irresistible golden topping. Sharp cheddar adds tang while Monterey Jack stays beautifully gooey.
- Fresh parsley: A bright, fresh garnish that adds color contrast and cuts through the richness. It makes the dish look restaurant-worthy.
- Beef broth: Your secret weapon if the filling seems too dry. It adds extra flavor while ensuring the interior stays succulent.
How to Make It
Preheat Your Oven:
Crank your oven to 375°F (190°C) and grab a 9×13 inch baking dish or large oven-safe skillet. Give it a light coating of oil or non-stick spray so nothing sticks and cleanup stays simple.
Par-Boil the Peppers:
Fill a big pot with salted water and bring it to a rolling boil. Carefully drop in your bell peppers for 3-4 minutes to soften them slightly, then lift them out with tongs and let them drain upside down on paper towels. This step isn’t mandatory, but it guarantees your peppers will be fork-tender and not crunchy.
Sauté the Aromatics:
Heat olive oil in a large skillet over medium-high heat. Toss in your chopped onion and stir for 4-5 minutes until it turns soft and translucent, then add the minced garlic and cook just until you can smell that incredible fragrance, about one minute more.
Brown the Beef:
Add your ground beef to the skillet and break it up with a wooden spoon. Cook until it’s nicely browned all over, about 5-7 minutes, then drain off any excess grease so your filling isn’t greasy.
Build the Filling:
Stir in your salt, black pepper, and dried oregano, then pour in the undrained diced tomatoes and cooked rice. Let everything simmer together for 2-3 minutes so the flavors meld, then remove from heat and stir in half of your shredded cheese.
Prepare for Baking:
Arrange your par-boiled peppers cut-side up in your baking dish. If they wobble, slice a tiny bit off the bottom to create a stable base so they stand proud and don’t tip over.
Fill the Peppers:
Spoon that hearty beef and rice mixture into each pepper, packing it down gently to eliminate air pockets. Sprinkle the remaining cheese evenly over the tops of each stuffed pepper.
Bake to Perfection:
Cover the dish tightly with foil and bake for 25 minutes, then remove the foil and continue baking for another 10-15 minutes. You’re looking for tender peppers and bubbly, golden brown cheese on top.
Rest and Serve:
Pull the dish from the oven and let the peppers rest for 5 minutes. This makes them easier to handle and allows the filling to set up properly. Garnish with fresh parsley if you’re using it and serve them hot.
You Must Know
- Always par-boil your peppers for perfectly tender results
- Don’t skip draining the beef fat or your filling will be greasy
- Let them rest before serving so the filling doesn’t spill out
- I always make extra because everyone wants seconds
Storage Tips
Leftover stuffed peppers store beautifully in an airtight container in your refrigerator for up to 3 days. When you’re ready to reheat, place them in an oven-safe dish, cover with foil, and warm in a 350°F oven for 15-20 minutes until heated through. The microwave works in a pinch, though the peppers will be softer and the cheese won’t be as crispy. I actually love eating them cold straight from the fridge because the flavors have mingled even more, especially that cheesy top layer.
Ingredient Substitutions
You can easily swap the ground beef for ground turkey, chicken, or even plant-based crumbles if you prefer a lighter or vegetarian option. If you don’t have long-grain white rice, brown rice works great too, just make sure it’s fully cooked beforehand. Feel free to use any melting cheese you have on hand like mozzarella, provolone, or even pepper jack for extra kick. Don’t have fresh parsley? Skip it entirely or use dried oregano or basil for the garnish. For a gluten-free version, just double-check your canned tomatoes and beef are certified gluten-free, which most are.
Serving Suggestions
These stuffed bell peppers are hearty enough to stand alone, but I love serving them alongside a crisp green salad tossed with a tangy vinaigrette to cut through the richness. For a true comfort food experience, add some crusty garlic bread to soak up any delicious juices that escape onto the plate. A simple coleslaw with apple cider vinegar provides a refreshing crunch that complements the tender peppers perfectly. For a lighter meal, pair them with roasted vegetables like zucchini or asparagus that roast beautifully alongside the peppers during the final baking time.
Cultural Context
Stuffed peppers represent American comfort food at its finest, though their roots trace back to Mediterranean and Middle Eastern traditions that wrap spiced meats and grains in vegetables. This dish perfectly embodies mid-century American home cooking, where home cooks learned to stretch affordable ingredients like ground beef and rice into satisfying family meals. Every region seems to have its own version – some use tomato sauce, others add different spices, but the core concept remains the same. What makes this classic recipe special is how it transforms humble ingredients into something that feels both nourishing and celebratory, a tradition worth passing down through generations.
Pro Tips
- Use a rainbow of bell pepper colors for stunning presentation
- Add a pinch of red pepper flakes for gentle heat
- Pre-cooking the peppers ensures they’re never crunchy
- If the filling looks dry, splash in some beef broth before baking
- I always let them rest the full 5 minutes despite the temptation
Frequently Asked Questions
Any color bell pepper works beautifully in this Stuffed Bell Peppers Recipe. Green peppers offer a slightly more robust, bitter flavor, while red, yellow, or orange peppers are sweeter. Choose firm, large peppers that stand upright easily for the best presentation.
Yes! You can assemble the peppers up to 24 hours in advance. Cover and refrigerate them until you’re ready to bake. You may need to add 5-10 extra minutes to the cook time if baking straight from the fridge. Cooked leftovers keep well for 3-4 days.
You can easily swap the ground beef for ground turkey, chicken, or even a plant-based ground meat alternative. If using leaner meats like turkey, consider adding a tablespoon of olive oil to the filling to maintain moisture, as this Stuffed Bell Peppers Recipe relies on some fat for flavor.
Your Stuffed Bell Peppers Recipe is done when the peppers are tender enough to be easily pierced with a fork (about 45 minutes at 375°F). The filling should be bubbling and the cheese on top should be melted and golden brown. The internal temperature of the meat should reach 160°F.
Since this Stuffed Bell Peppers Recipe includes rice and protein, it’s practically an all-in-one meal. For an American-style dinner, pair it with a simple green salad, garlic bread, or roasted vegetables. It also goes well with mashed potatoes if you want extra comfort food vibes.