


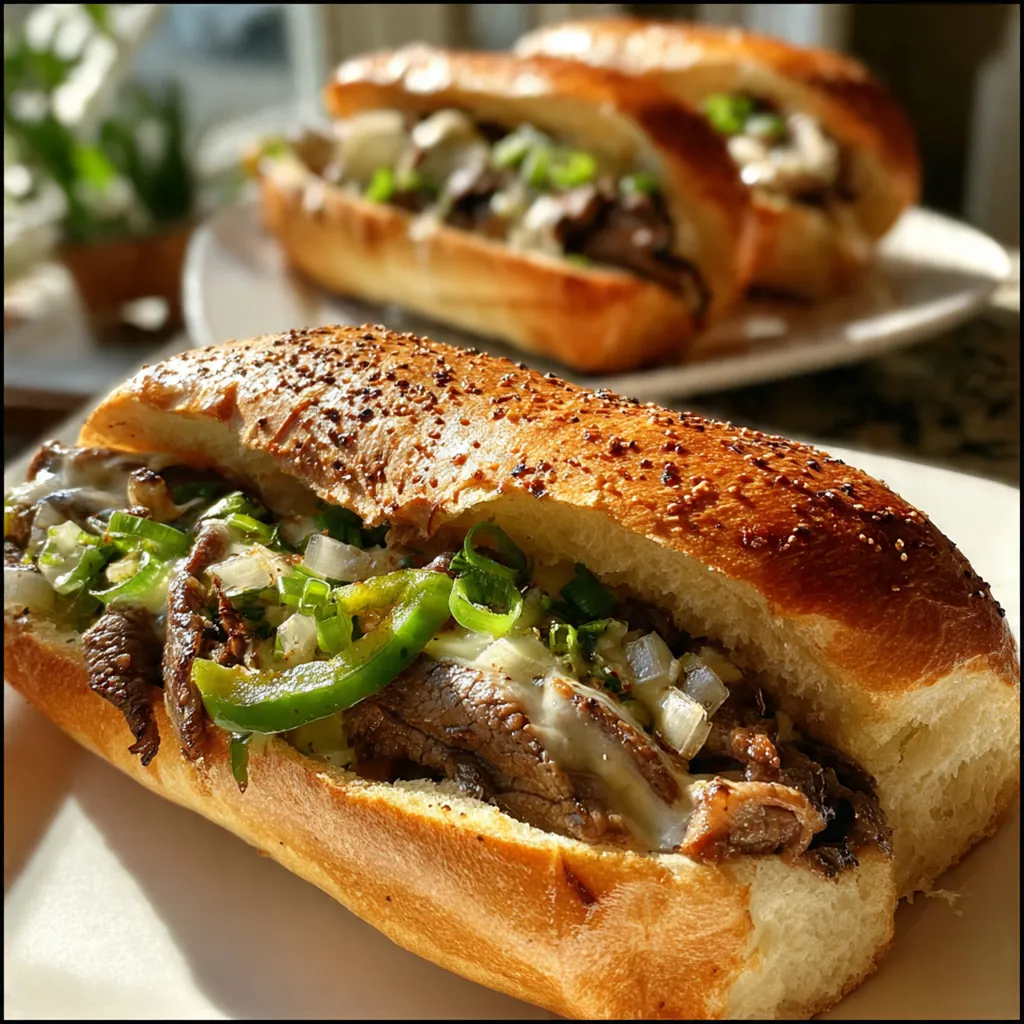
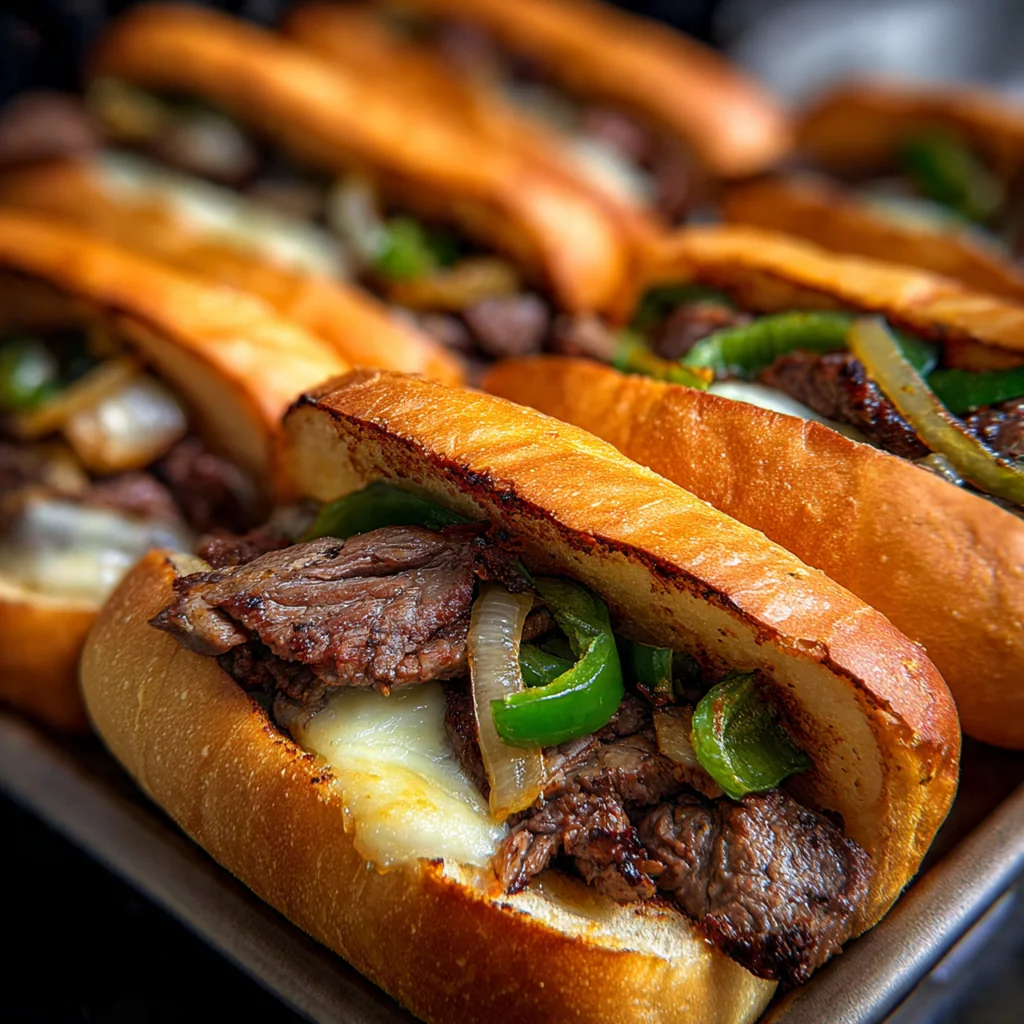
The secret to a phenomenal Philly cheesesteak starts right here with your own homemade Philly Cheesesteak Hoagie Rolls. That perfect combination of a crisp, golden shell and a soft, chewy interior isn’t just luck—it’s a simple baking project that transforms your sandwich game. These authentic hoagie rolls, a true Philadelphia staple, cradle all the juicy steak and melty cheese without ever getting soggy. Once you bake a batch, you’ll understand why this foundation is non-negotiable for the real deal.
Why You'll Love This Recipe
- Fresh flavor that completely outshines any bag from the grocery store
- Perfect texture with a crisp crust and a wonderfully soft, chewy inside
- They hold up to the juiciest fillings and never turn to mush
- Makes your homemade cheesesteak feel like the real Philadelphia experience
- You get to top them exactly how you like
Ingredients You’ll Need
- Warm water: activates the yeast and starts the fermentation; it needs to be just warm to the touch, not hot, or you’ll kill the yeast.
- Active dry yeast: the living organism that makes the dough rise and gives the rolls their airy texture; make sure your packet is fresh.
- Granulated sugar: feeds the yeast to get it bubbling and adds a hint of sweetness that balances the savory crust.
- Bread flour: has a higher protein content than all-purpose flour, which creates more gluten for that essential chewy, structured crumb.
- Salt: controls yeast activity and is crucial for developing deep flavor in the dough; never skip it.
- Olive oil: enriches the dough for a more tender interior and a better shelf life; a good extra virgin works perfectly.
- Egg white: used in an optional wash to create a shiny, professional-looking golden brown top on the baked rolls.
- Sesame seeds or poppy seeds: classic toppings for added texture and visual appeal; you can use one or a mix.
- Cornmeal: dusted on the baking sheet to prevent sticking and gives the bottom of the roll a tiny bit of rustic crunch.
How to Make It
Activate the Yeast:
In your large bowl, combine the warm water with the yeast and sugar and give it a gentle stir. Let it sit undisturbed for about five to ten minutes. You’re waiting for it to get nice and foamy on top, which tells you the yeast is alive and ready to work its magic on your flour.
Mix the Dough:
Stir in four cups of the bread flour and all of the salt with a wooden spoon until you’ve got a shaggy, sticky mass. Pour in the olive oil and mix until it’s incorporated. Then, add the remaining flour a little at a time, mixing until the dough starts to pull away cleanly from the bowl’s sides.
Knead Until Smooth:
Turn the dough out onto a surface you’ve lightly dusted with flour. Knead it by hand for a solid eight to ten minutes, adding just tiny bits of extra flour if it sticks to your hands. You’ll know it’s ready when it feels smooth, elastic, and springs back slowly when you poke it.
First Rise:
Place your kneaded dough into a lightly oiled bowl, turning it once to coat it all over. Cover the bowl tightly with a damp kitchen towel or plastic wrap. Let it rise in a warm, draft-free spot until it’s doubled in size, which usually takes about an hour and a half. Patience here builds flavor and texture.
Shape the Hoagies:
Punch the risen dough down firmly to release the large air bubbles. Turn it out and divide it into eight equal pieces using a sharp knife or bench scraper. Roll each piece into a log about six inches long, gently tapering the ends to get that classic hoagie shape.
Second Rise:
Line your baking sheets with parchment or sprinkle them with a little cornmeal. Arrange the shaped rolls on the sheets, leaving a good three inches between them so they have room to expand. Cover them loosely and let them puff up again for another 30 to 45 minutes. They won’t double, but they’ll look noticeably fuller.
Prep and Bake:
While the rolls do their final rise, preheat your oven. If you’re using the egg wash, brush a light coat over the top of each roll now and sprinkle on your seeds. Bake them until they’re a deep, glorious golden brown and sound hollow when you tap the bottom, rotating the pans halfway through for an even bake.
Cool Completely:
This is the hardest but most important step. Transfer the baked rolls to a wire rack immediately and let them cool all the way down before you even think about slicing. This waiting period lets the interior crumb set properly, so you don’t end up with a gummy texture.
You Must Know
- Bread flour is key for the right chewy texture
- Letting the dough double on the first rise is non-negotiable
- Cooling completely before slicing prevents a gummy mess
- I never skip the second rise for the perfect puff
Storage Tips
Once your Philly Cheesesteak Hoagie Rolls are completely cool, store them in a paper bag at room temperature for a day or two—the paper helps keep the crust crisp. For longer storage, pop them into a resealable freezer bag and freeze for up to three months. When you’re ready, just thaw them at room temperature or give them a quick warm-up in a 350°F oven for five to ten minutes to bring back that fresh-baked feel. I always make a double batch to freeze because having these on hand is a game-changer.
Ingredient Substitutions
If you’re out of bread flour, all-purpose flour will work in a pinch, but expect a slightly less chewy and more tender crumb. You can substitute instant yeast for the active dry; just mix it right in with the dry ingredients and reduce the first rise time by about 15 minutes since it acts faster. For the egg wash, a simple brush of olive oil, milk, or even water will give you a matte, traditional finish instead of a shiny one. No cornmeal? Just use parchment paper on your baking sheets—it works like a charm to prevent sticking.
Serving Suggestions
Of course, these Philly Cheesesteak Hoagie Rolls are begging to be loaded with thinly sliced ribeye, melted provolone or Cheez Whiz, and plenty of sautéed onions and peppers. But don’t stop there. They make an incredible base for a loaded Italian sub with cured meats and sharp provolone, or they’re sturdy enough to handle a saucy, messy meatball sandwich. I’ve even used day-old rolls for fantastic breadcrumbs or to make the most amazing garlic bread you’ve ever had.
Cultural Context
The hoagie roll is as much a part of Philadelphia’s identity as the Liberty Bell, and its specific texture is no accident. Developed to withstand the juicy, greasy goodness of a proper cheesesteak without disintegrating, it’s a piece of edible engineering. Bakeries in Philly have their own closely guarded methods, but the goal is universal: a crust sturdy enough to contain the mess and a soft, absorbent interior that soaks up just the right amount of flavor. Making them at home connects you directly to that iconic food tradition, turning a simple sandwich into an authentic experience.
Pro Tips
- Weigh your flour for perfect consistency every single time
- Let dough rise in a warm oven with just the light on
- Tent with foil if the tops brown too quickly
- Cooling on a wire rack is absolutely mandatory
- I always use the scale now—it’s a total game-changer
Frequently Asked Questions
It’s best to stick with bread flour for authentic Philly Cheesesteak Hoagie Rolls. Bread flour has a higher protein content (around 12-14%) than all-purpose, which creates more gluten. This gives the rolls their essential chewy, sturdy interior and helps form that crisp, golden crust that holds up to juicy fillings.
Absolutely. You can shape the rolls after the first rise, place them on a baking sheet, cover tightly, and refrigerate overnight. The next day, let them come to room temperature and complete their second rise before baking. You can also freeze the baked and cooled rolls for up to 3 months. Just thaw and reheat in the oven to refresh the crust.
If you only have instant yeast, you can use it as a direct 1:1 substitute for the active dry yeast in these Philly Cheesesteak Hoagie Rolls. Since instant yeast doesn’t need to be proofed, you can mix it directly with the dry ingredients. Just ensure your water temperature is still around 110°F to properly activate the other ingredients.
Your Philly Cheesesteak Hoagie Rolls are done when they have a deep golden-brown crust and sound hollow when tapped on the bottom. The internal temperature should register between 190-200°F on an instant-read thermometer. They’ll also feel light for their size and will have pulled away slightly from the sides of the pan.
While they’re the star of a classic Philly cheesesteak with thinly sliced ribeye and melted provolone, these versatile rolls are also perfect for Italian hoagies, meatball subs, or even as a base for pulled pork. For a classic Philadelphia spread, serve them with crispy potato chips, a tangy pickle spear, and a cold soda.