


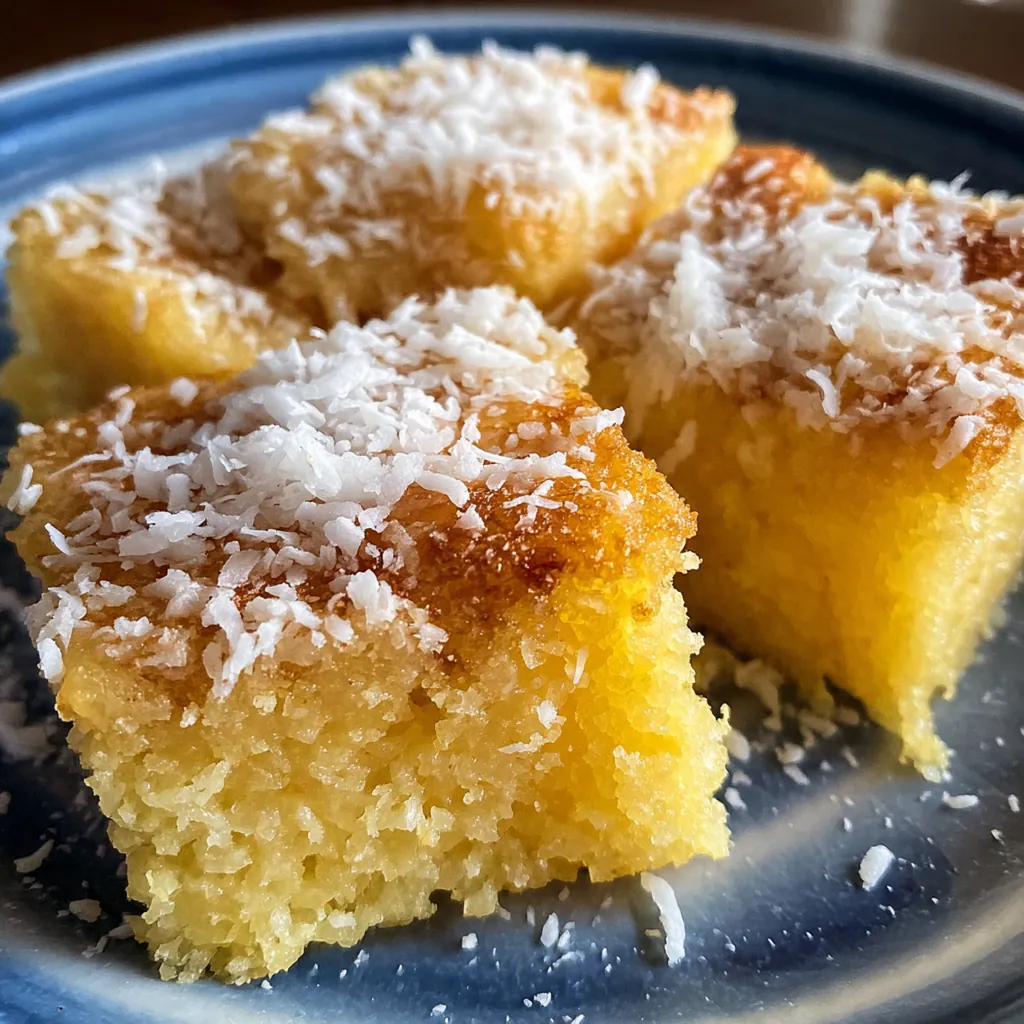
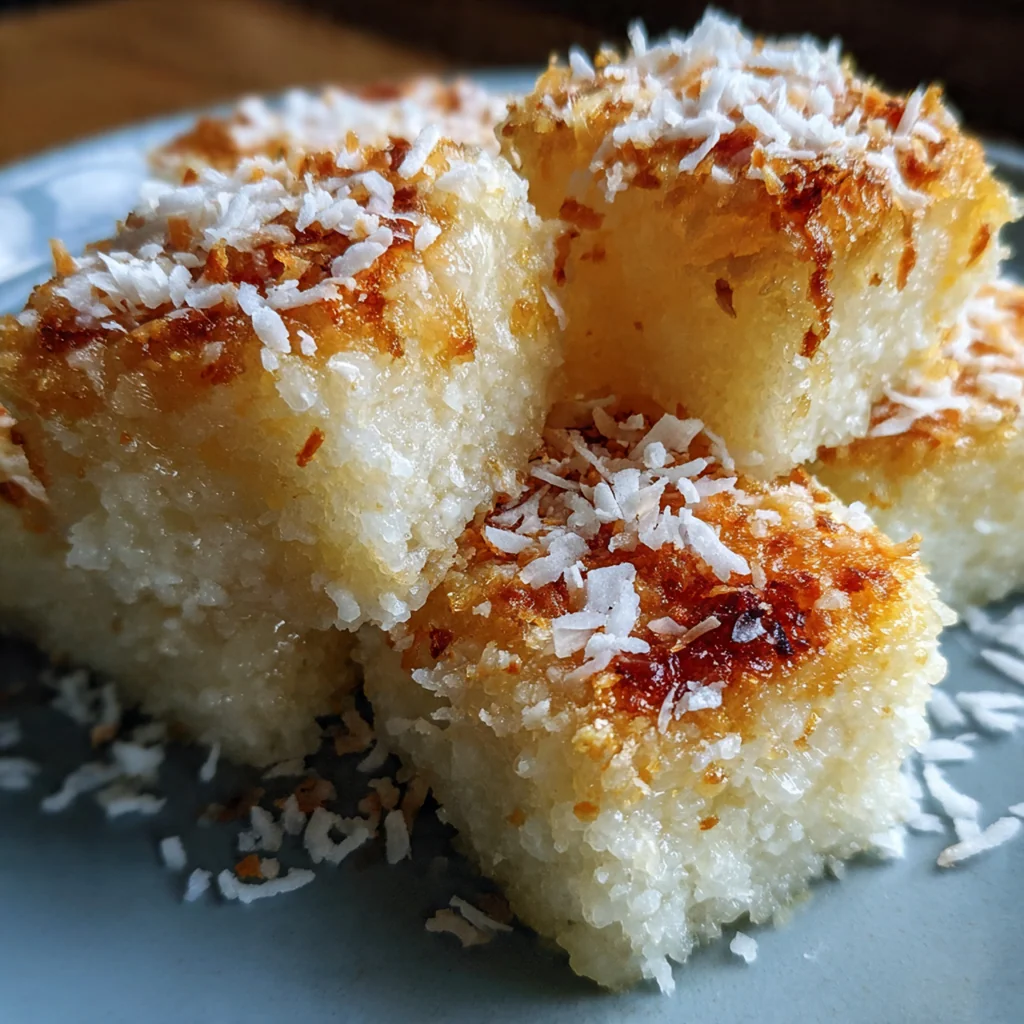
Hawaiian Butter Mochi is that perfect potluck dessert that disappears first every single time. This beloved local treat blends the chewy, stretchy texture of mochi with a rich, custardy coconut base and plenty of buttery goodness. Born from the islands’ love of mochi, it combines sweet rice flour with coconut milk for something truly special. My grandma made this for every family gathering, and now you can bring that authentic island flavor to your kitchen with just one bowl and no mixer needed.
Why You'll Love This Recipe
- Only 10 minutes of prep time with absolutely no mixer required
- Incredibly moist and chewy texture that stays tender for days
- Makes a huge batch perfect for sharing at parties and potlucks
- One-bake wonder that comes together in a single bowl
- That rich buttery coconut flavor tastes just like the islands
Ingredients You’ll Need
- Sweet rice flour: This is the magic ingredient that creates that signature chewy mochi texture, look for mochiko flour on the label
- Sugar: Sweetens the batter and helps create that golden crust when baked, granulated works perfectly
- Baking powder: Gives just a tiny lift so the mochi isn’t too dense, don’t skip this
- Salt: Balances all the sweetness and enhances the coconut flavor, regular table salt works fine
- Large eggs: Binds everything together and adds richness to the custardy base, room temp blends easier
- Evaporated milk: Adds creamy body without making it too heavy, found in the baking aisle
- Full-fat coconut milk: The star flavor that makes this authentically Hawaiian, shake the can well before opening
- Unsalted butter: Melted into the batter for that signature buttery taste and moist crumb
- Vanilla extract: Deepens all the flavors and pairs beautifully with coconut, pure extract is best
- Toasted sesame seeds: Optional topping that adds nice crunch and nutty flavor
- Toasted coconut flakes: Optional topping for extra coconut punch and texture
- Powdered sugar: Optional dusting that makes it pretty and adds sweet finish
How to Make It
Prepare Your Pan:
Preheat your oven to 350°F and generously grease a 9×13 inch baking pan with butter or non-stick spray, making sure to coat the corners well. Line the bottom with parchment paper, leaving an overhang on the sides so you can lift the mochi out easily later. This setup ensures clean edges and mess-free removal every time.
Mix The Dry Ingredients:
In a large mixing bowl, whisk together the sweet rice flour, sugar, baking powder, and salt until well combined and no lumps remain. These dry ingredients form the foundation of your Hawaiian butter mochi, so take a moment to break up any clumps. I like to use a fine-mesh strainer if my flour seems particularly clumpy.
Combine The Wet Ingredients:
In a separate medium bowl, lightly beat the eggs, then add the evaporated milk, coconut milk, melted butter, and vanilla extract. Whisk until the mixture is smooth and fully incorporated. Using room temperature ingredients here helps everything blend together beautifully without any streaks.
Bring It All Together:
Pour the wet ingredients into the dry ingredients and gently mix with a rubber spatula or whisk until just combined and smooth. The batter will be thick but pourable – this is exactly the right consistency for authentic mochi texture. Don’t overmix or you’ll lose that tender quality.
Fill The Pan:
Pour the batter into your prepared baking pan, spreading it evenly to the corners with your spatula. Tap the pan gently on the counter 2-3 times to release any trapped air bubbles that could create pockets in your finished mochi. This quick step ensures an even, smooth texture throughout.
Bake To Golden Perfection:
Place the pan in the center of the preheated oven and bake for 50-55 minutes. The top should turn a beautiful golden brown and the edges will pull away slightly from the sides. Test with a toothpick in the center – it should come out with a few moist crumbs, not wet batter.
Cool Completely:
Remove from the oven and let the mochi cool in the pan for at least 2 hours. For the best texture and cleanest cuts, cool completely for 4 hours or refrigerate overnight. The mochi continues to set as it cools, making it easier to slice cleanly.
Cut And Serve:
Once fully cooled, lift the mochi out using the parchment paper overhang. Cut into 12 squares using a plastic knife or a sharp knife lightly greased with oil for clean cuts that won’t stick. If desired, sprinkle with toasted sesame seeds, toasted coconut flakes, or dust with powdered sugar before serving.
Store For Later:
Layer the cut pieces between parchment paper in an airtight container. Store at room temperature for up to 2 days or refrigerate for up to 1 week. Let refrigerated mochi come to room temperature for 15-20 minutes before serving for that perfect chewy texture.
You Must Know
- Use ONLY sweet rice flour (mochiko) – regular rice flour won’t give you the chewy texture
- Room temperature eggs blend easier and create a smoother, more uniform batter
- Don’t overmix – stop as soon as you no longer see dry flour pockets
- Chill before slicing for the cleanest cuts and wipe your knife between pieces
- The edges pulling away from the pan is your signal that it’s fully baked
- My family has been making this recipe for generations and I’ve learned that patience with co…
Storage Tips
Store your Hawaiian butter mochi in an airtight container with parchment paper between layers to prevent sticking. It’ll stay fresh at room temperature for 2 days or in the fridge for up to a week. The mochi will firm up when chilled, so let it sit out for 15-20 minutes before serving to regain that perfect chewy texture. You can also freeze individual pieces for up to 3 months – just thaw at room temperature and they’re ready to eat. I love that this recipe makes enough to share and still have leftovers for snacking.
Ingredient Substitutions
For a dairy-free version, swap the evaporated milk with additional coconut milk and use vegan butter or coconut oil instead of dairy butter. If you can’t find full-fat coconut milk, light coconut milk works but the texture will be slightly less rich. Make sure you’re using mochiko sweet rice flour specifically – other gluten-free flours won’t work here since we need that specific glutinous rice texture. If you want to reduce sugar, you can cut it by 1/4 cup but the mochi won’t be quite as sweet or develop that beautiful golden crust.
Serving Suggestions
Serve your Hawaiian butter mochi at room temperature with hot coffee or tea for the perfect afternoon treat. It’s an amazing ending to a Hawaiian-style dinner featuring teriyaki chicken or kalua pork. For an extra indulgent dessert, warm pieces in the microwave for 10-15 seconds to make them soft and gooey. Try crumbling it over vanilla ice cream or serving alongside fresh tropical fruits like mango or pineapple. I love packing squares for picnics or beach days – they’re sturdy enough to travel but taste incredibly special.
Cultural Context
Hawaiian butter mochi represents the beautiful fusion of Japanese and Hawaiian food cultures that developed over generations of island life. Traditional Japanese mochi gets a tropical makeover with coconut milk and butter, creating something uniquely Hawaiian that you’ll find at virtually every potluck, birthday, and family gathering across the islands. This dessert bridges cultures – the mochiko flour honors the Japanese heritage of plantation workers, while the coconut milk celebrates the tropical abundance of Hawaii. It’s more than just a sweet treat; it’s a taste of local ‘ono’ (delicious) history that brings people together.
Pro Tips
- Only use sweet rice flour (mochiko) – regular rice flour won’t give you that chew
- Room temperature eggs incorporate more easily for a smoother batter
- Don’t overmix – stop as soon as you no longer see dry flour pockets
- The pan is fully cooled when edges pull away and center springs back lightly
- Chill 30 minutes before slicing and wipe knife between cuts for clean squares
- I’ve found that making this the day before an event actually improves the texture and makes …
Frequently Asked Questions
While full-fat coconut milk provides the signature flavor, you can substitute the evaporated milk with more coconut milk or whole milk if needed. However, using both ensures the perfect custardy texture and rich flavor that makes this Hawaiian Butter Mochi authentic.
Your Hawaiian Butter Mochi is ready when the edges are golden brown and pull away slightly from the pan, and the center is set but still slightly jiggly (like custard). A toothpick inserted in the center should come out mostly clean with a few moist crumbs attached.
The texture depends on the mochiko flour ratio and baking time. If it’s too hard, you may have overbaked it or used too much flour. If it’s too soft/sticky, it likely needs more baking time. Using the exact 1:1 ratio of mochiko flour to sugar and fat is key to that perfect chewy-yet-tender texture.
Hawaiian Butter Mochi is unique because it’s baked rather than steamed, creating a custardy, cake-like texture. It combines sweet rice flour (mochiko) with butter, coconut milk, and eggs, giving it a rich, chewy, and moist consistency that’s distinctly Hawaiian compared to traditional Japanese mochi.
Yes! Hawaiian Butter Mochi is actually better the next day as the flavors meld and the texture sets. Once cooled completely, wrap it tightly in plastic wrap and store at room temperature for 2-3 days, or refrigerate for up to a week. The texture becomes even chewier and more flavorful overnight.